Treating lower crossed syndrome exercises has become something of a familiar topic in the fitness and posture-correction world. As some users on Reddit have pointed out, much of the information available online tends to sound repetitive:
“Work your glutes more and stretch the overly tight posterior muscles.”
While this advice is not entirely wrong, it is often overly simplified and lacks practical structure.
So what is the real answer?
How do you fix lower crossed syndrome?
Which exercises should you prioritise—and in what order?
This article aims to address each of these questions in detail.
Before we begin, you can review our previous article to better understand the symptoms and characteristics of lower crossed syndrome and the overactive muscles
Lower Crossed Syndrome Exercises: Priorities and Order
Correcting lower crossed syndrome involves restoring muscle strength, length, and tone in a structured order.
The Four Key Muscle Groups That Maintain Pelvic Neutrality
Four major muscle groups work together to maintain a neutral pelvis:
- Rectus abdominis – provides upward force from the front
- Hip flexors (iliopsoas and rectus femoris) – provide downward force from the front
- Lower back muscles (quadratus lumborum and erector spinae) – provide upward force from the back
- Hip extensors (hamstrings and gluteus maximus, primarily hamstrings) – provide downward force from the back
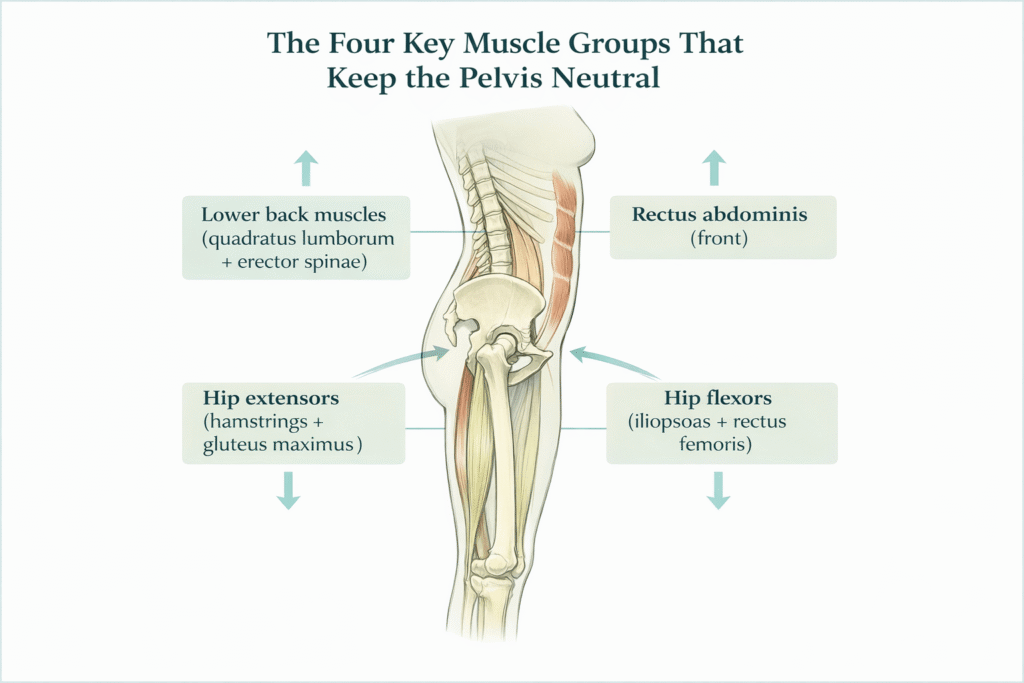
Proper balance among these groups keeps the pelvis neutral.
A commonly accepted corrective sequence is:
Abdominals + hip flexors → hip extensors → lower back muscles
Why This Order Matters
Prolonged sitting weakens the abdominal muscles while shortening the hip flexors. When returning to standing, tight hip flexors often fail to lengthen fully. If the rectus abdominis cannot provide adequate upward force, the pelvis tilts forward.
As the pelvis tilts forward, the lower back muscles shorten passively, and the hamstrings lengthen. Importantly, lengthened muscles are not necessarily relaxed; like a stretched spring, they may carry increased tension.
For this reason, correction begins with restoring length and function to the iliopsoas and rectus femoris.
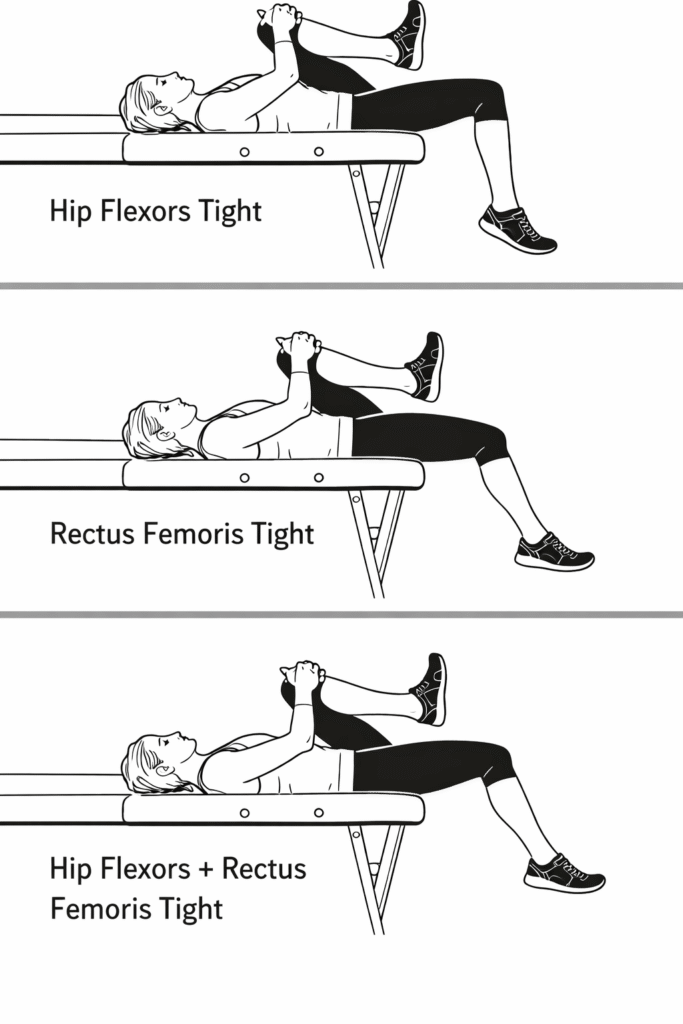
Thomas Test: Assessment and Correction
The Thomas test serves as both an assessment and a corrective method.

Lie supine on a treatment table and pull one knee firmly toward the chest, flattening the lumbar spine against the surface. Observe the opposite leg.
Common Outcomes
- Thigh lifts off the table while the lower leg hangs slightly downward → Hip Flexors Tight
- Thigh stays flat but the lower leg lifts upward → Rectus Femoris Tight
- Both thigh and lower leg lift → Hip Flexors + Rectus Femoris Tight
Iliopsoas tightness is usually felt deep in the anterior hip, while rectus femoris tightness is felt along the front of the thigh.
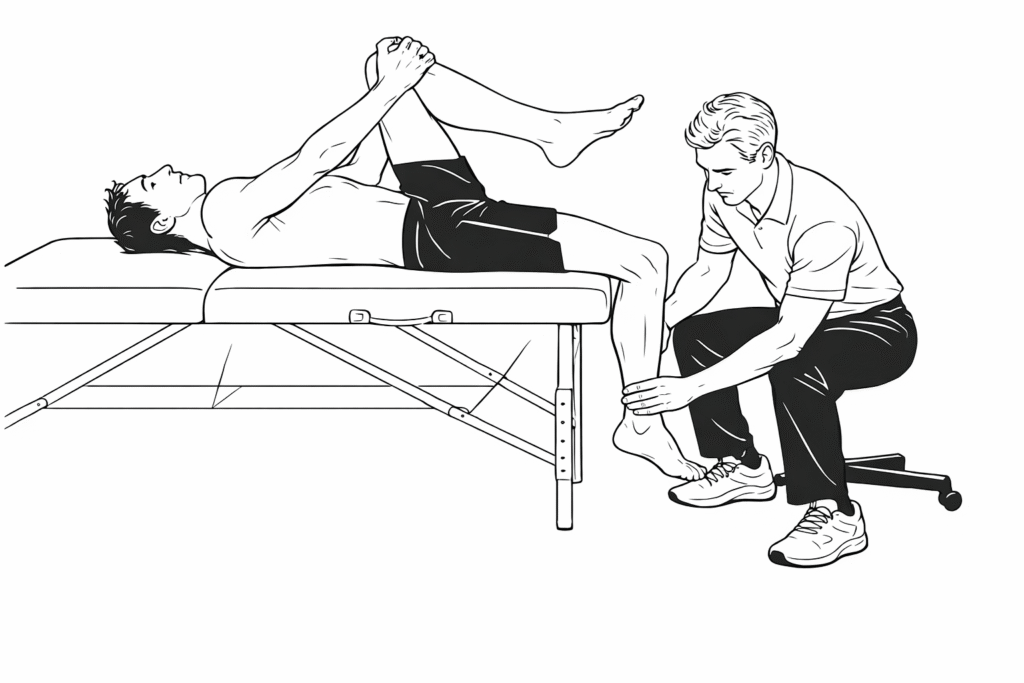
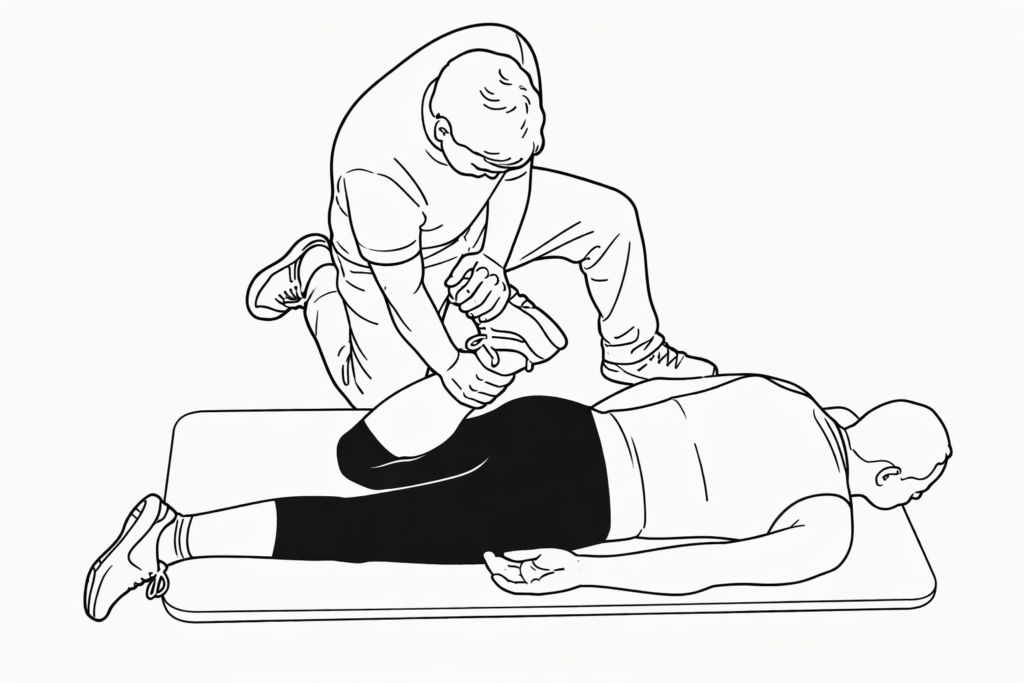
Assisted Correction
- To stretch the rectus femoris, keep the lumbar spine flat, hold one knee to the chest, and have a partner gently push the opposite ankle downward.
- To target the iliopsoas, apply a downward force to the front of the thigh when it lifts off the table.
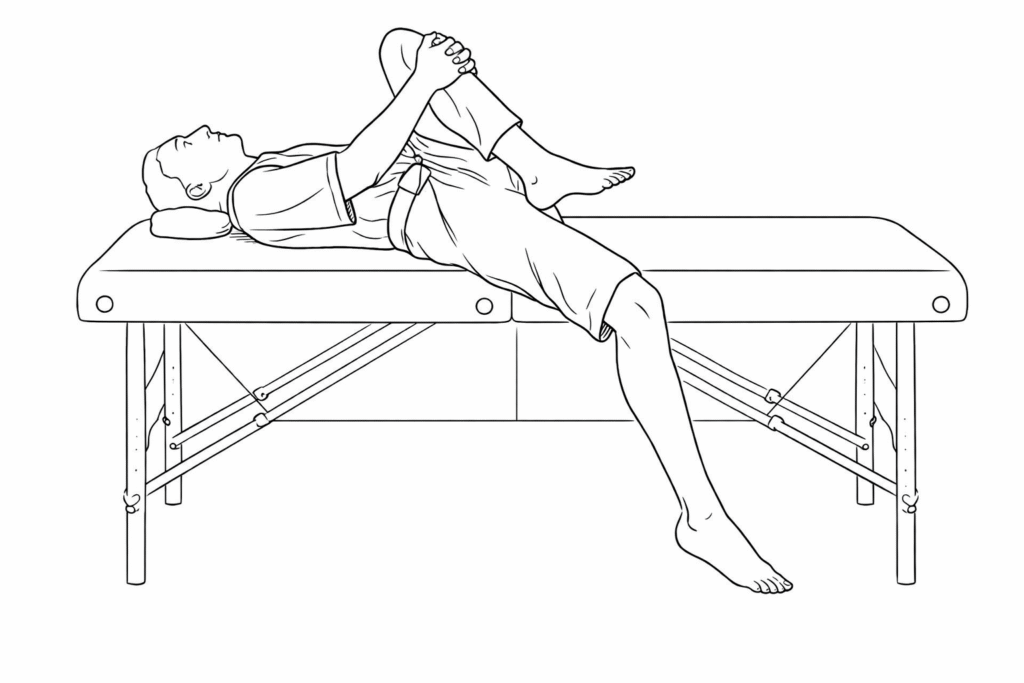
Self-Release Without Assistance
If no partner is available, lie near the edge of a bed and allow one leg to hang freely. The weight of the leg provides sufficient traction to stretch the iliopsoas and rectus femoris.
Passive Stretching Exercises for the Hip Flexors
Passive Hip Flexor Stretch (Knee Flexion Emphasis)
As shown in the illustration, perform a large-range knee flexion, aiming to bring the heel as close to the glutes as possible.
This exercise is particularly suitable after training, when blood flow to the legs is increased and the muscles are already warm. It serves both as a relaxation drill and as an effective stretch for the quadriceps muscle group, targeting all four heads of the quadriceps.
If you want to increase the stretching intensity, place a half foam roller under the distal portion of the thigh, slightly elevating the front of the thigh, and then attempt to bring the heel toward the glutes again.
This variation places greater emphasis on stretching the rectus femoris, as it crosses both the hip and knee joints. That said, the remaining three heads of the quadriceps are still stretched to a similar degree as in the original version.
For a more advanced option, you can also perform direct foam rolling on the anterior thigh, slowly rolling along the quadriceps to further reduce muscle tension.
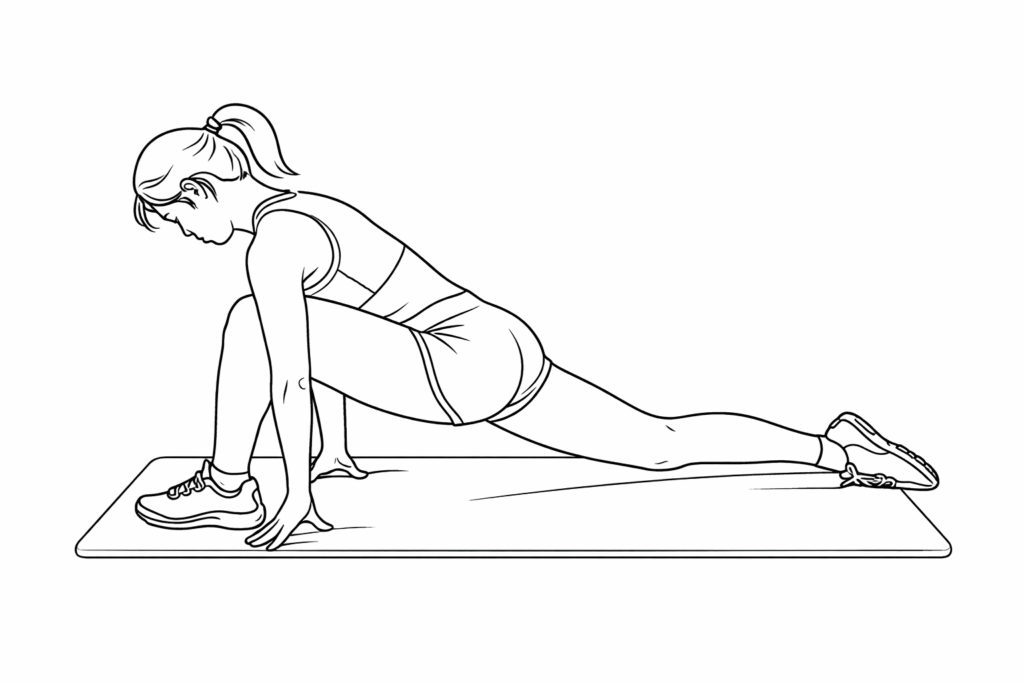
Iliopsoas Stretching Exercise
The following illustration shows a compound stretching exercise that targets both the iliopsoas and the rectus femoris simultaneously.
Because the setup and movement pattern are visually intuitive, the technical cues will not be repeated in detail here. When performed correctly, this stretch provides a clear sensation along the front of the hip and upper thigh, making it an effective option for addressing hip flexor tightness.
Daily Exercises to Relieve Lower Back Discomfort
If you experience lower back discomfort while lying down, or notice that there is a large gap between your lower back and the bed when you lie supine, the following exercise can be particularly helpful.
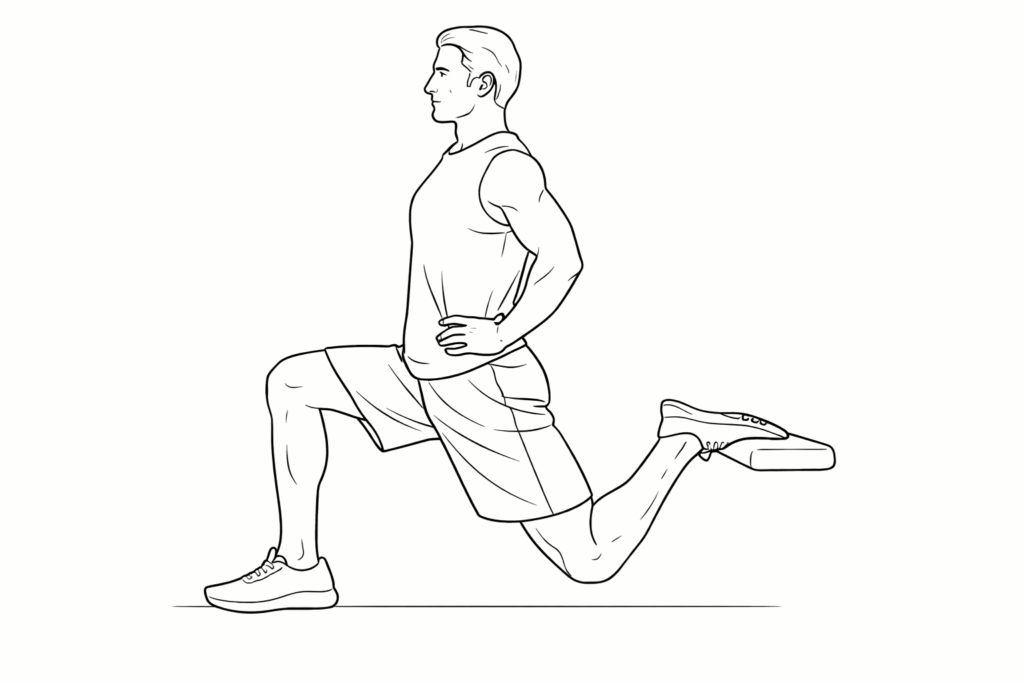
Perform 3 sets of a deep lunge stretch, holding each set for 30 seconds, preferably every evening.
As shown in the illustration, step one leg far forward into a long lunge. The rear leg should remain extended, with the shin as close to the ground as possible.
This position provides an effective stretch for the hip flexor group on the trailing side, especially the iliopsoas.
Alternatively, you may keep the rear toes lightly in contact with the ground and allow your body weight to sink downward. This variation often produces a very strong stretch sensation in the front of the hip joint.
With consistent practice, many people notice that lower back discomfort upon waking is significantly reduced the following morning.
Adding a Side Bend to Increase the Stretch
While holding the lunge position, gently tilt your torso to the opposite side.
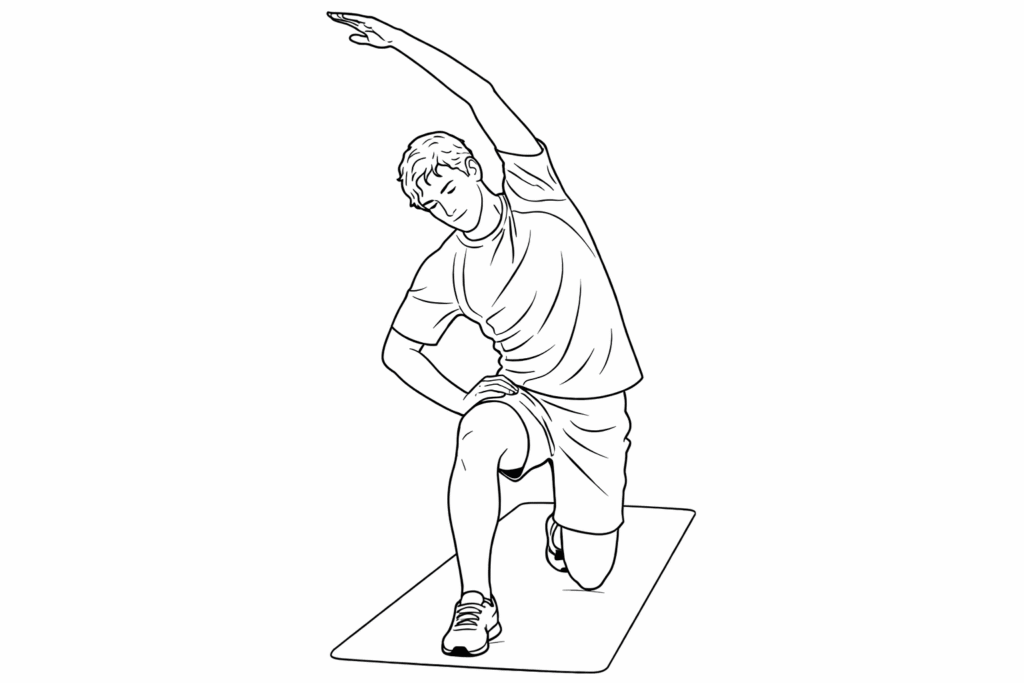
This is effective because the upper attachment of the iliopsoas connects to the lumbar spine. When you perform lateral flexion, the distance between the muscle’s attachment points increases, thereby intensifying the stretch on the iliopsoas.
Effect on Anterior Pelvic Tilt
By consistently performing the exercises described above and restoring both the iliopsoas and rectus femoris to their optimal resting length, anterior pelvic tilt can be significantly improved.
Once excessive hip flexor tightness is reduced and normal muscle length is restored, the pelvis is far more likely to return toward a neutral position, creating a stronger foundation for posture correction and subsequent strength training.
Abdominal Musculature: A Functional System
The abdominal wall functions as an integrated system:
- Rectus abdominis runs vertically at the front
- External obliques form a V-shaped diagonal pattern
- Internal obliques run diagonally in the opposite direction, forming an A-shaped pattern
- Transversus abdominis, the deepest layer, runs horizontally and plays a key role in increasing intra-abdominal pressure and spinal stability
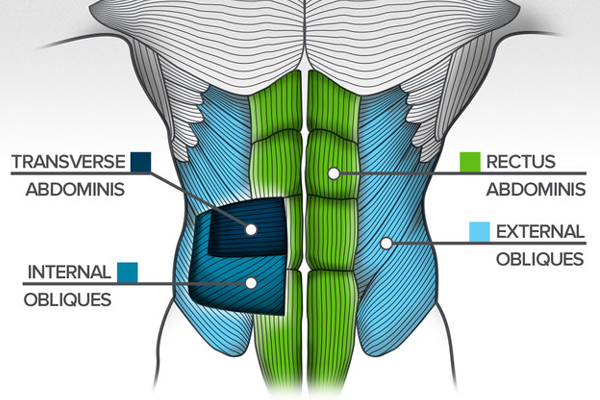
Because the abdominal wall is formed by the coordinated action of these four muscle groups, core training—especially for beginners—should aim to activate and strengthen all of them together. Focusing exclusively on the rectus abdominis may disrupt the natural balance within the abdominal system and ultimately create new strength imbalances between muscle groups.
This also helps explain why it is now relatively uncommon to see coaches recommend isolated crunches as the primary method for abdominal training.
Training Priority: From Hip Flexors to Abdominals
As discussed earlier, addressing hip flexor tightness is the first priority in the corrective sequence. Once the hip flexors have been properly managed, the next area that should receive attention is abdominal strength and control.
In daily posture and during exercise, what we truly rely on is not raw muscular strength alone, but functional strength—the ability to actively use the core to stabilise the body during movement.
For example, many people enjoy performing crunches, sometimes even adding external loads of 10–20 kg. While this may increase the visible strength or thickness of the abdominal muscles, such strength does not always transfer effectively to real-life movement or compound exercises.
What we need instead is functional abdominal strength, which requires a different approach to training.
So, what is the most effective method?
The answer is not a specific strength exercise, but breathing.
Breathing as the Foundation of Core Training
Before progressing to traditional abdominal exercises, it is essential to first establish intra-abdominal pressure through proper breathing mechanics. Only after this foundation is in place should more demanding abdominal exercises be introduced.
Changes in Breathing Patterns
Due to modern work environments, many people experience a shift in breathing patterns—from diaphragmatic (abdominal) breathing to chest-dominant breathing.
Chest breathing relies primarily on the intercostal muscles surrounding the rib cage. However, the diaphragm is the only true primary respiratory muscle in the human body. Under normal conditions, breathing should be driven by the upward and downward movement of the diaphragm.
When breathing becomes chest-dominant and relies on accessory muscles, the neck and shoulders often become overworked, leading to tension, fatigue, and inefficient breathing patterns.
There are several signs that may indicate breathing dysfunction, such as excessive shaking during crunches or difficulty maintaining core tension during a plank.
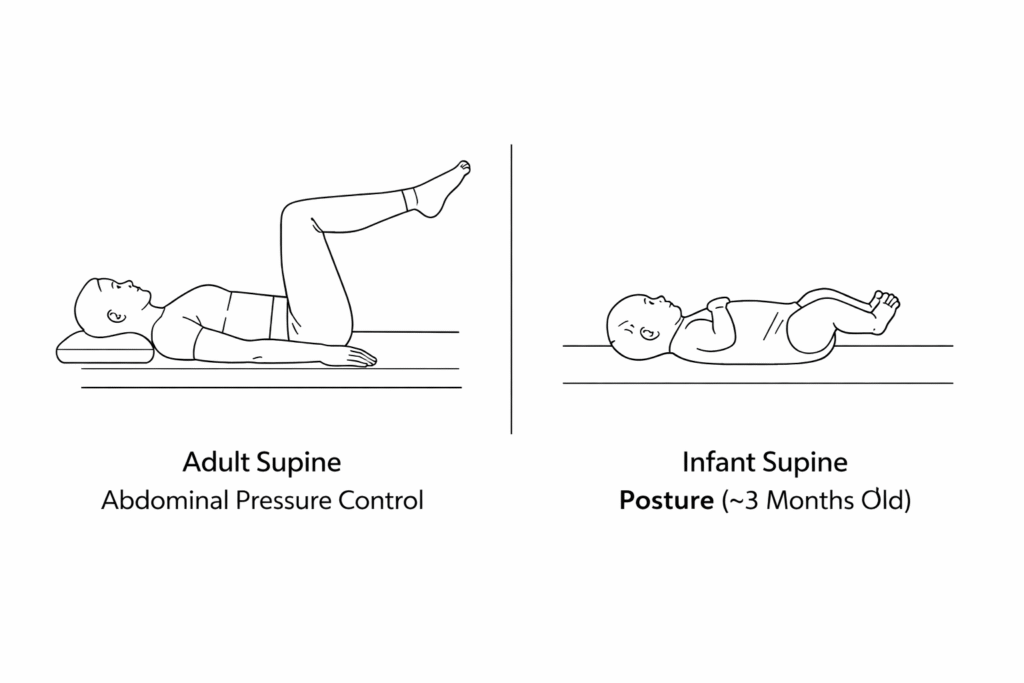
Self-Regulation of Intra-Abdominal Pressure – Supine Position
Step 1: Transition From Chest Breathing to Diaphragmatic Breathing
Begin in a supine position, as this posture places the lowest demand on core stability. Lie flat on a treatment table or firm surface.
This position closely resembles the developmental posture of a three-month-old infant.
- Place a small cushion under the head to prevent excessive rib flare.
- Allow a natural gap between the lumbar spine and the surface, approximately the width of one palm.
- In this position, both the rib cage (diaphragm) and the pelvis (pelvic floor muscles) should be in a neutral alignment.
- Flex both hips and knees so that the thighs are vertical and the shins form a 90-degree angle with the thighs.
- The abdomen should feel gently engaged rather than relaxed.
Breathing pattern:
- Inhale and allow the abdomen to expand.
- During exhalation, breathe out gently while maintaining the abdominal expansion, rather than letting the abdomen collapse.
You may place one hand on the chest and the other on the abdomen. During inhalation, the hand on the chest should remain relatively still, while the hand on the abdomen rises with the breath.
Regression Option
If this is difficult, begin with a simpler version:
- Inhale and allow the abdomen to expand.
- Exhale while actively drawing the abdomen inward.
Breathing can be visualised like a compressed ball. During inhalation, the diaphragm descends and draws air into the lungs, causing the “ball” (the core) to expand in all directions.
Once this regression successfully activates the diaphragm and transversus abdominis, return to the primary breathing drill described above.
Why Keep the Abdomen Expanded During Exhalation?
Maintaining abdominal expansion during exhalation is similar to inflating a tyre. The air inside the abdominal cavity supports the surrounding muscles, increasing stiffness and stability. This pressure allows the core to better support the spine during movement.
Perform 4 sets of 4 breaths.
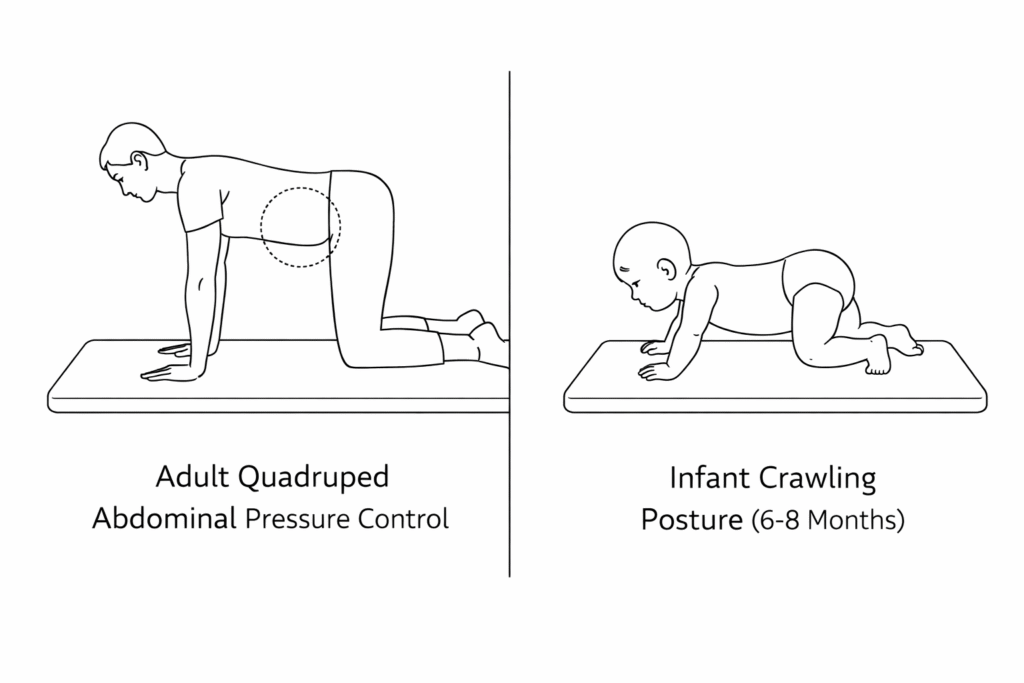
Self-Regulation of Intra-Abdominal Pressure – Quadruped Position
Step 2: Progress to All-Fours
Progress from the supine position to a quadruped (all-fours) position, following natural human developmental patterns. Supine posture reflects early infancy (~3 months), while quadruped posture corresponds to later stages (~6–8 months).
- Position the body on hands and knees.
- Keep the spine neutral, with the arms and thighs vertical to the ground.
- The head, upper back, and pelvis should remain aligned in a straight line, similar to a bent-over posture.
From this position, gently shift the body forward and backward:
- As you move forward, reach the head slightly forward.
- As you move backward, allow the hips to move toward the heels.
The movement should come primarily from the shoulder joints and hip joints, while the shape of the spine remains unchanged.
Breathing pattern:
- Inhale and allow the abdomen to expand.
- Exhale gently while attempting to maintain abdominal expansion.
Perform 4 sets of 4 repetitions, where one forward-and-back movement counts as one repetition.
The range of motion does not need to be large. The key focus is maintaining posture and core control.
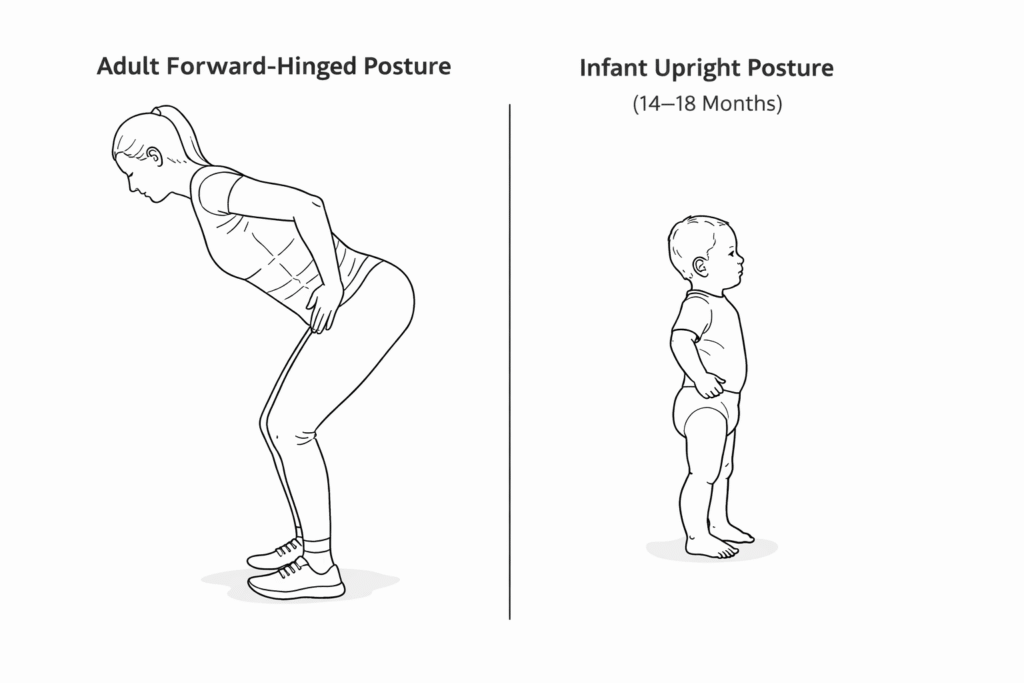
Self-Regulation of Intra-Abdominal Pressure – Standing Hip-Hinge Position
Step 3: Progress to Standing
If the quadruped position can be performed with good control, the next progression is the standing hip-hinge position. This posture closely resembles many resistance training movements, making it highly relevant for overall training performance.
Being able to control intra-abdominal pressure in this position greatly enhances movement quality across many exercises.
- Assume a bent-over rowing setup: hips and knees slightly flexed, spine neutral.
- Place the hands on the hips.
- The torso should form approximately a 45-degree angle with the ground.
Breathing and movement sequence:
- Inhale and allow the abdomen to expand.
- Exhale gently while maintaining abdominal expansion, and slowly stand upright.
- Once standing, inhale again and expand the abdomen.
- Exhale gently, keep the abdomen expanded, and slowly return to the hip-hinge position.
Perform 4 sets of 4 repetitions per side.
Individual Progression Considerations
The time required to progress through these three stages varies depending on the individual’s physical condition. Some people may only need one or two sessions in the supine position before progressing to quadruped. Others may require a longer period before they can meet the quality standards of the standing hip-hinge position.
Progress should always be guided by control and quality, not speed.
Gluteus Maximus and Hamstrings
The gluteus maximus and hamstrings extend the hip and are commonly trained through squats, bridges, step-ups, and stair climbing. Regular resistance training is usually sufficient to strengthen these muscles.
Summary
Lower crossed syndrome may contribute to lower back pain, lumbar fatigue, and knee discomfort due to imbalances in muscle length and strength.
- Muscles that tend to shorten: iliopsoas, quadriceps (especially rectus femoris), erector spinae, quadratus lumborum
- Muscles that tend to lengthen: gluteus maximus, gluteus medius, hamstrings, abdominal musculature
Restoring balance through structured mobility, breathing, and strength training can significantly improve posture, movement quality, and training safety.
