In this article, we will introduce treating exercises for upper crossed syndrome.
Before getting started, if you are not yet familiar with what upper crossed syndrome is, we strongly recommend reading our previous article for background information.
As mentioned earlier, if upper crossed syndrome is left untreated for a long period of time, it may progressively worsen and, in some cases, lead to permanent structural damage.
Once a condition reaches that stage, it becomes extremely difficult—if not impossible—to fully correct or rehabilitate it through muscle work or training alone.
That is why, before introducing any corrective exercises, it is crucial to clarify who should NOT attempt to treat upper crossed syndrome through exercise.
Before You Start: When Upper Crossed Syndrome Exercises Are NOT Safe
If you experience any of the following conditions, do not attempt corrective training on your own. Instead, seek medical evaluation first.
1. Unexplained Arm Numbness
This does not refer to temporary numbness caused by sleeping on your arm. It refers to arm numbness that occurs during daily life without any external compression.
This symptom often indicates that cervical nerves are being compressed close to where they exit the spine, suggesting serious cervical spine or disc pathology.
2. Dizziness When Turning the Head
If you feel sudden dizziness when turning your head—similar to the heavy-headed sensation after a night of heavy drinking—this is a red flag and should not be ignored.
3. History of Unexplained Fainting
This does not refer to hypoglycaemia. It refers to individuals who have experienced fainting episodes without a clear medical diagnosis.
In such cases, the underlying risk may be hidden and could surface during physical training.
4. “Walking on Cotton” Sensation
This refers to a sensation of lightheadedness, heavy head, and unstable footing, similar to a hangover. It often indicates insufficient blood flow or oxygen supply to the cervical region—something exercise alone cannot resolve.
If you have any of the above symptoms, seek medical care before considering corrective exercise.
Upper Crossed Syndrome Treatment Exercises: Where to Start
This diagram should look familiar. The “X” in upper crossed syndrome represents the characteristic pattern of muscle imbalance shown in the image.
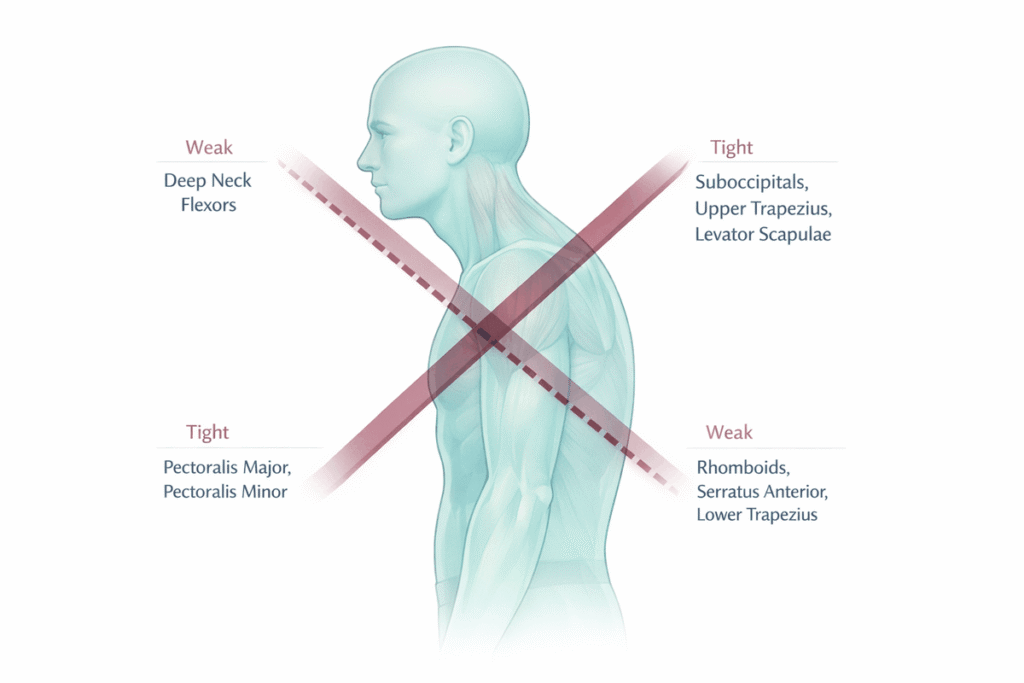
The classic symptoms—rounded shoulders, hunchback posture, and forward head position—are caused by overactive (tight) muscles crossing with underactive (weak) muscles.
Weak Muscles
- Deep cervical flexors
The muscles at the front of the neck become weak and lengthened, while the posterior neck muscles shorten. - Upper back muscles
The area between the shoulder blades becomes weak, including:- Rhomboids
- Serratus anterior
- Lower trapezius
Overactive (Tight) Muscles
- Upper shoulder muscles
- Suboccipital muscles
- Upper trapezius
- Levator scapulae
- Chest muscles
- Pectoralis major
- Pectoralis minor
Once we identify which muscles are tight and which are weak, the corrective strategy becomes clear:
- Release the overactive muscles
- Strengthen the underactive muscles
The goal is to restore the body to a neutral and balanced posture.
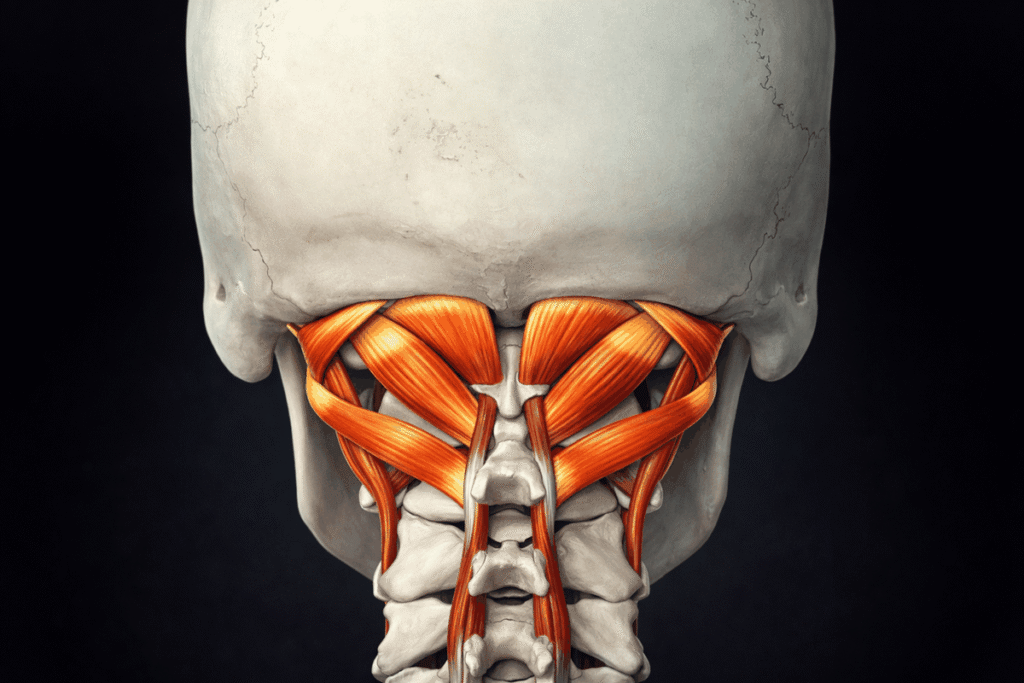
Suboccipital Muscle Release Exercises
You may not be familiar with the suboccipital muscles because they are not commonly trained in daily life or workouts. However, they are extremely important.
If you have ever received a massage or asked someone to help you relax your neck, think about where they instinctively press—right at the junction between the skull and the neck. That is the suboccipital region.
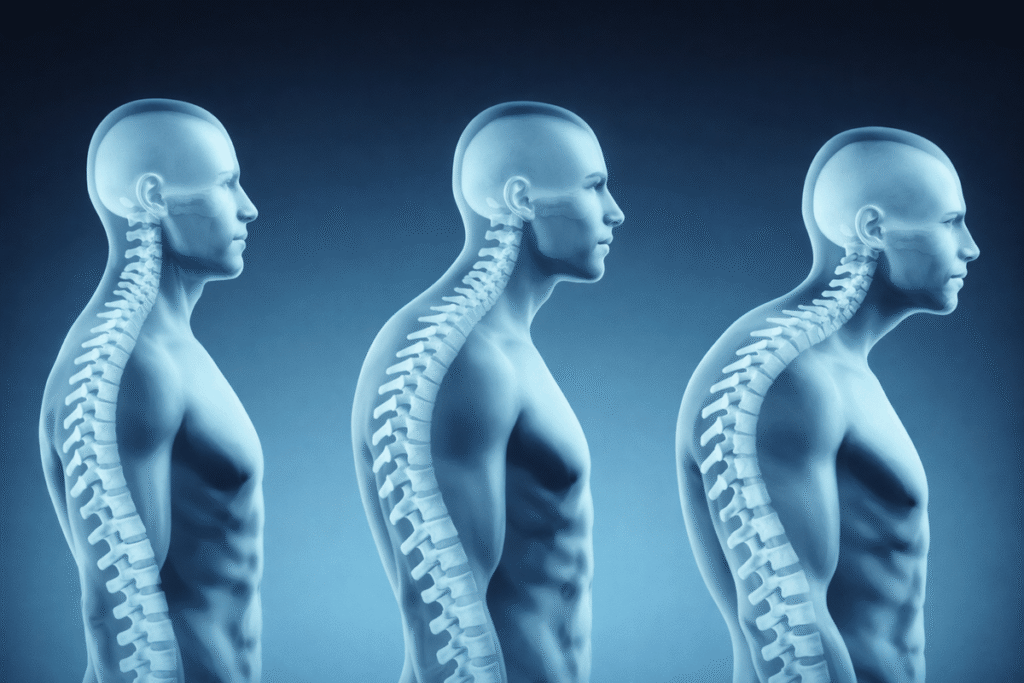
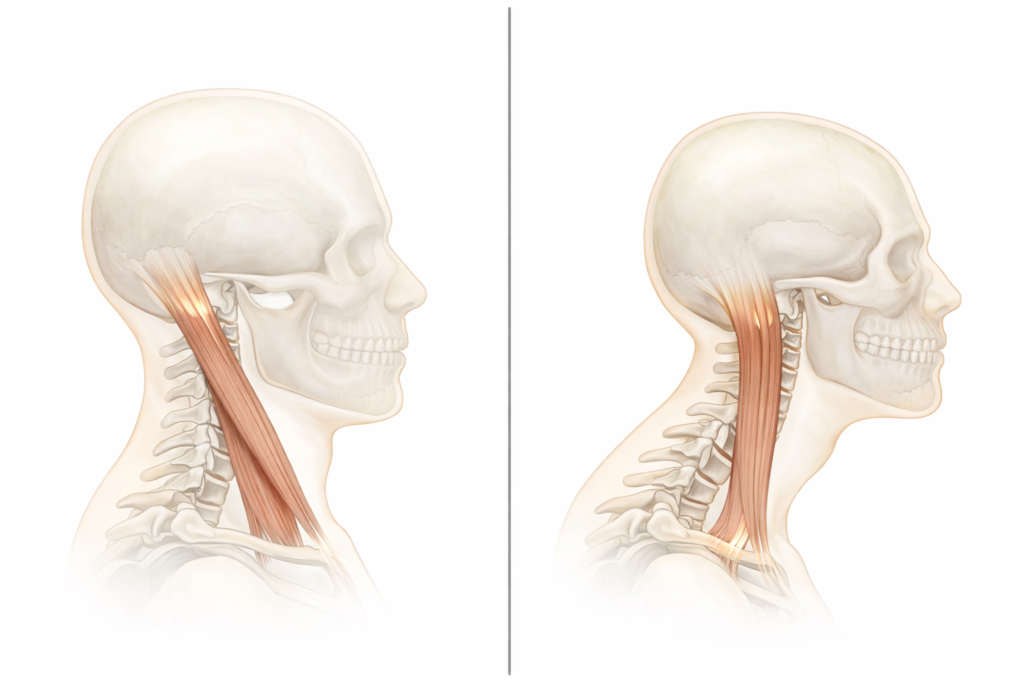
As shown in the images:
- In a neutral head position, cervical curvature is normal
- As the head moves forward, cervical lordosis increases
- In severe cases, cervical curvature becomes excessively exaggerated
These changes are driven by muscle contraction, specifically in the suboccipital muscles.
The further the head protrudes forward, the tighter and more rigid these muscles become.
A Simple Awareness Exercise
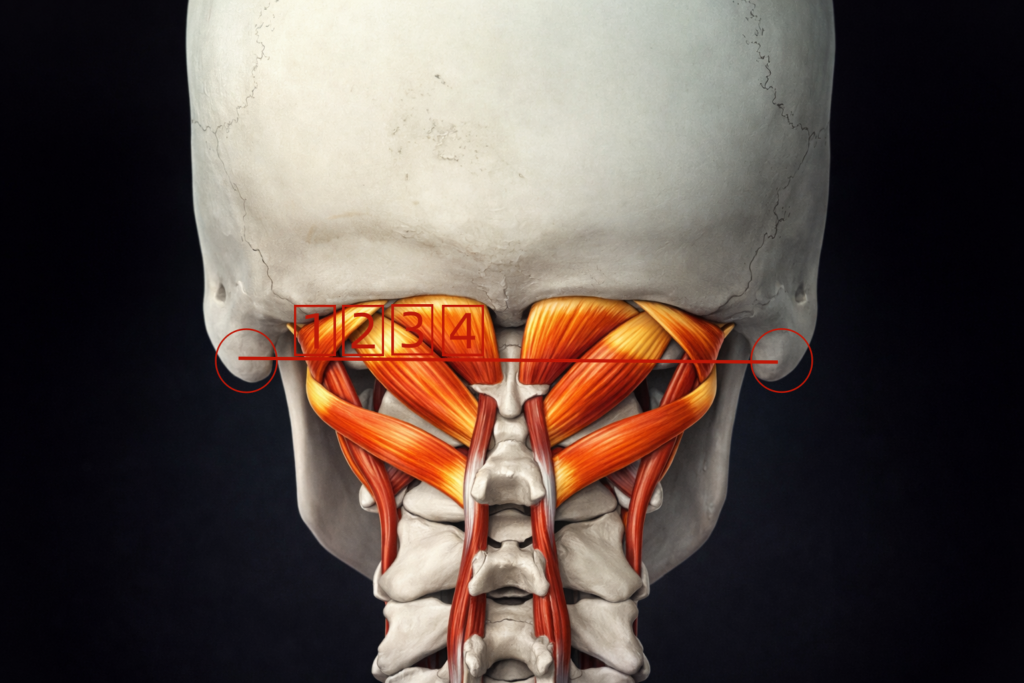
Place your thumb at the suboccipital area shown in the image and close your eyes.
Slowly move your eyes up, down, left, and right, tracing a circular pattern.
You will feel the muscle beneath your thumb contracting rhythmically in response to eye movement.
The suboccipital group consists of four small muscles.
Why does eye fatigue improve after massaging this area?
Because many cervical nerves in this region are neurologically connected to the eyes. Eye movement activates the suboccipital muscles—and conversely, releasing these muscles can reduce ocular strain.
For people who work long hours at a computer, this release can improve relaxation and even sleep quality.
Principles for Active Suboccipital Release
When performing self-release for the suboccipital muscles, follow these principles:
- Use short, repeated pressure rather than long holds
- Massage in a single, consistent direction
- On a pain scale of 1–10, aim for 5–7
- Massage each point 3–6 times per day
- Apply 10–12 presses per point
Short, repeated pressure helps flush old blood and bring in fresh, oxygenated blood. Prolonged pressure may restrict circulation due to the small size of these muscles.
Massage is not a one-time fix—it requires consistency and repetition.
Suboccipital Release: Step-by-Step
- Locate the mastoid processes behind both ears
- The area just below the skull is the suboccipital region
- Divide one side into four points
- Apply pressure using a 2s press – 2s pause – 2s release rhythm
- Complete all four points as one set; perform 3 sets per side
After releasing tight muscles, strengthening is essential to prevent recurrence.
Neck and Shoulder Strengthening Exercises
Corrective strengthening focuses on control and stability, not brute strength.
Phase 1: Neck Isometric Strengthening
Isometric contractions involve muscle activation without joint movement.
Using resistance bands, apply tension in different directions while resisting with the neck.
- Band pulling forward (from behind the neck) → targets the posterior neck muscles
- Band pulling laterally (across the side of the head) → targets the contralateral neck muscles
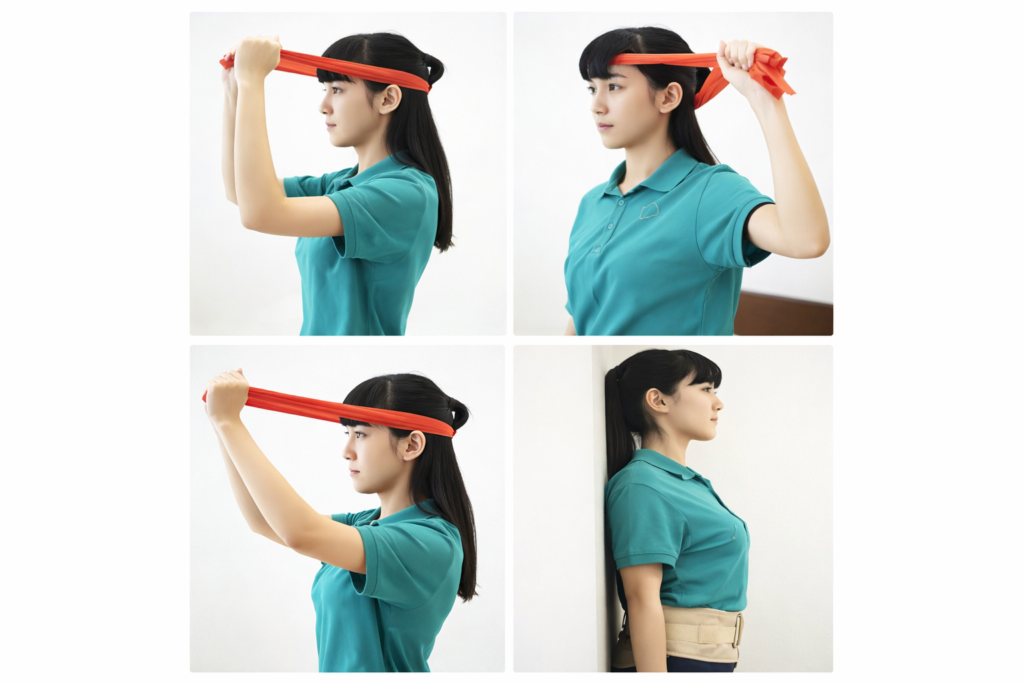
These drills build isometric endurance and multi-directional neck stability, helping the head stay in a neutral position.
Once control is established, progress to dynamic work by increasing band tension through controlled movement (as shown in the lower image).
Wall Alignment Exercise
Stand with your head, upper back, and hips against a wall, leaving about one palm-width between the lower back and the wall.
Hold this posture:
- Beginners: 1–2 minutes
- Progression: up to 3 minutes
This exercise helps retrain the brain to recognise correct posture.
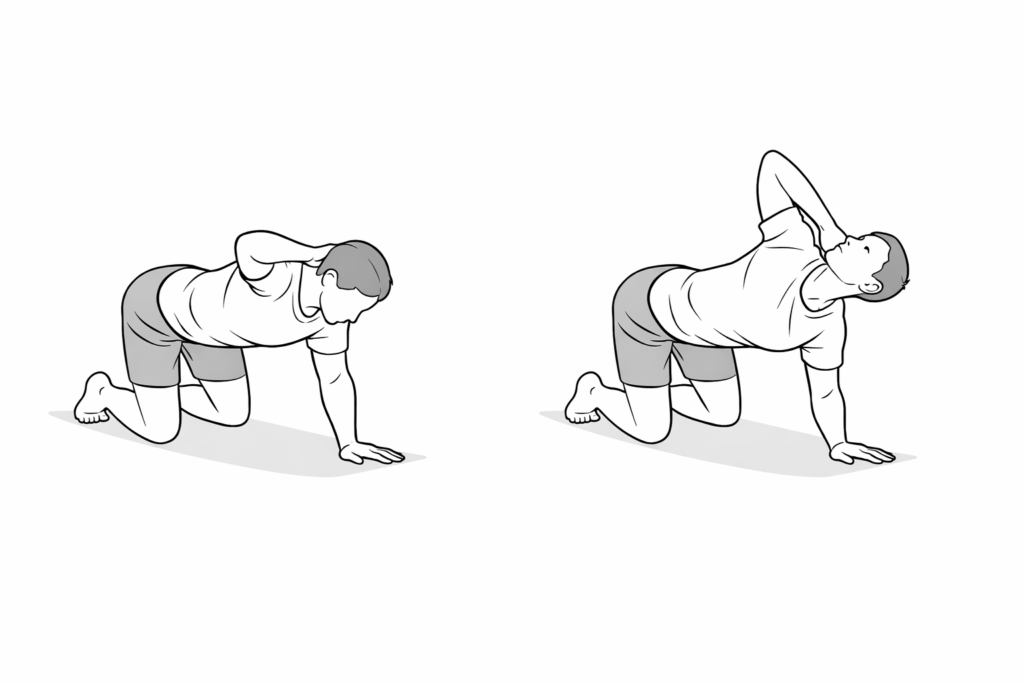
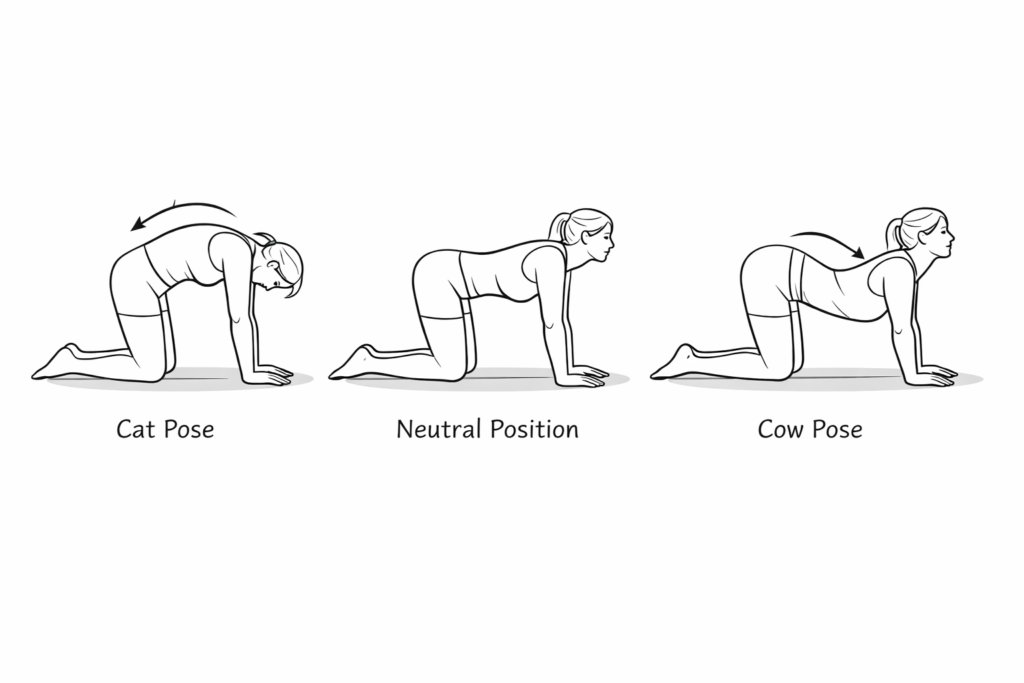
Thoracic Mobility (Optional)
As shown previously, cat–cow stretches and quadruped rotations are excellent warm-up exercises to improve thoracic mobility. These have been covered in earlier training plans and will not be repeated here.
Shoulder Muscle Release Exercises for Upper Crossed Syndrome
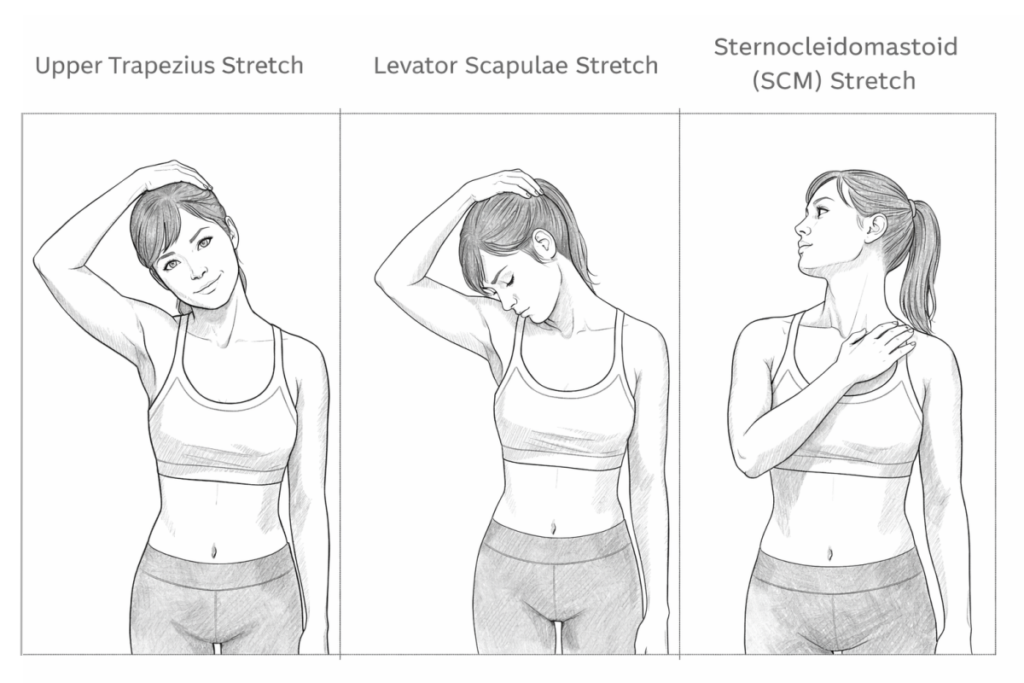
Sternocleidomastoid (SCM)
The SCM is a long strap-like muscle running from the clavicle and sternum to behind the ear.
Functions:
- Unilateral contraction → head rotation
- Bilateral contraction → neck extension and increased cervical lordosis
When the head shifts forward, the SCM becomes shortened.
Sternocleidomastoid (SCM) Stretch – Partner Assisted
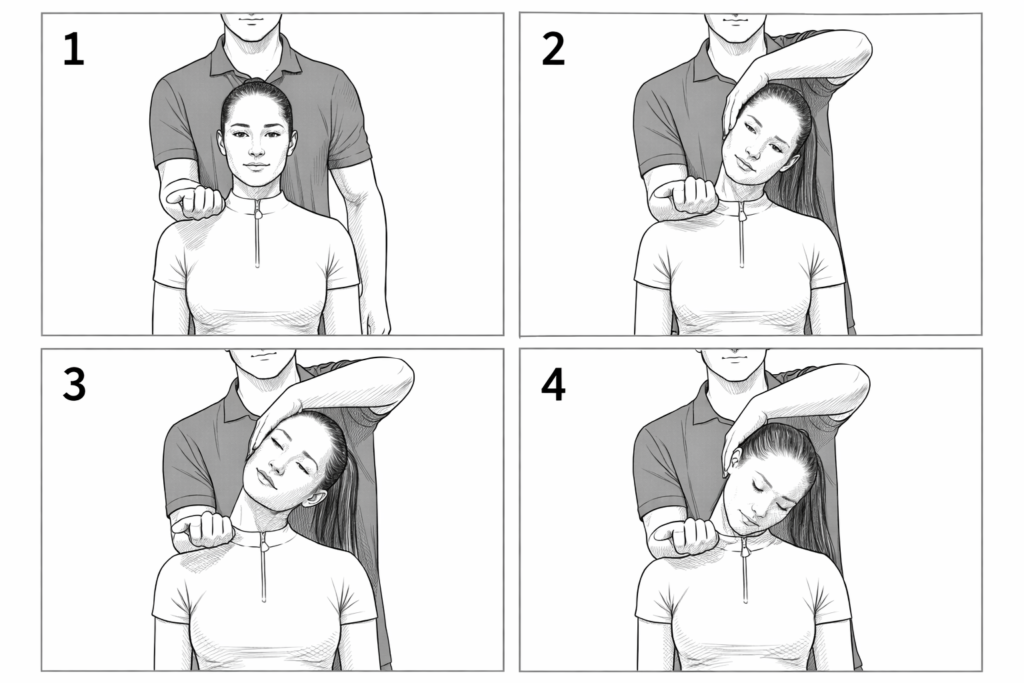
Setup
- Performed with a partner
- Stand tall, chest up, core lightly braced (neutral posture)
Key landmark
- Locate the bony point at the far end of the shoulder
- Move two finger-widths inward toward the neck
- Partner stabilises this point using the back of the forearm
Movement
- Partner supports the same-side ear
- Gently pull the head to the opposite side (lateral flexion)
- Hold 3–5s
- Rotate the head upward toward the ceiling, hold 3–5s
- Slight chin tuck, hold 45s
- Return to neutral
Hold time
- Postural correction: 45s
- General relaxation: 10–30s
Upper Trapezius & Levator Scapulae
In terms of their impact on training quality and postural alignment, the upper trapezius and levator scapulae are often the main culprits.
As shown in the image, seated rows are a common back exercise. In the upper part of the image, it is easy to see obvious shoulder shrugging during the movement.

In fact, this issue is not limited to seated rows. Lat pulldowns, lateral raises, and almost all upper-body exercises may show the same compensatory shrugging pattern.
Why does this happen?
Because the upper trapezius and levator scapulae are excessively tight.
Upper Trapezius Release Exercise
Setup
- Stand tall, chest up, core lightly braced (neutral posture)
Key landmark
- Locate the prominent bony point at the far end of the shoulder
- Move two finger-widths inward toward the neck
Release
- Use the back of the forearm (hand in a fist) to press down on the shoulder
- Internally rotate the forearm slightly to release the superficial fascia first
- Maintain pressure at the two-finger-in position
Movement
- Other hand supports the same-side ear
- Gently pull the head to the opposite side (lateral flexion)
- Continue pressing downward until a clear stretch is felt
- Hold 45s
- Return to neutral
Levator Scapulae Release Exercise
The levator scapulae is a relatively small muscle, but it plays a critical role in elevating the scapula.
1) Fascial Release (Partner-Assisted)
Setup
- Stand tall, chest up, core engaged
Key landmark
- From the earlobe, trace downward to the point where it intersects the upper medial border of the scapula
- This intersection is the attachment point of the levator scapulae
Release
- Place one hand on the shoulder
- Use the thumb to press on the levator scapulae attachment point
Movement
- Side-bend the head away from the pressed side
(e.g. press left → side-bend right) - Hold 1–2s, then return
- Repeat 3–4 times
This release usually requires assistance.
For individuals with very well-developed trapezius muscles (commonly males), the attachment point can also be accessed from the front of the body.
2) Muscle Stretch (Primary Release)
Setup
- Stand tall, chest up, core engaged
- Rotate the head 30–45° forward and diagonally
Key landmark
- Locate the shoulder tip
- Move two finger-widths inward, press down using the back of the forearm
Movement
- Slowly lower the head in the direction you are facing
- When a strong stretch is felt in the levator scapulae, hold 45s
- Return to neutral
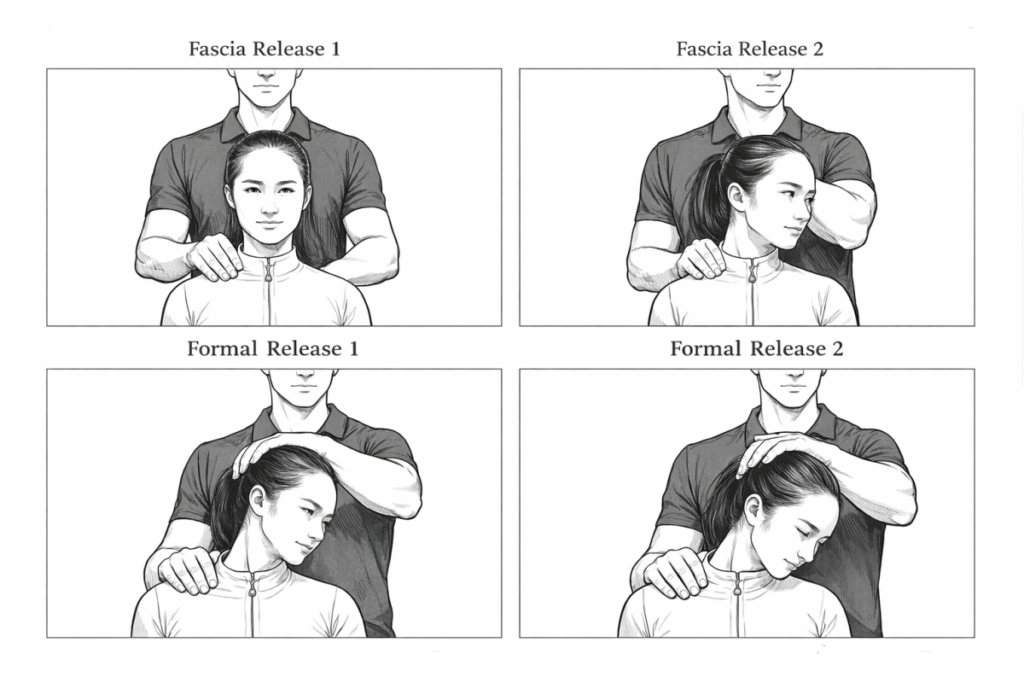
Active Neck & Shoulder Self-Release (Optional)
If you do not have a partner or prefer self-release, you can actively release the upper trapezius, levator scapulae, and sternocleidomastoid(Place your hand over the collarbone area, gently tilt your head slightly back, then rotate it to the right to perform the stretch.) using the method shown in the image.
Because the shoulder cannot be stabilised by another person, it is essential to anchor the shoulder:
- Hold a barbell or dumbbell
- Or grip a desk or fixed surface
This keeps the shoulder of the stretching side fixed and ensures the stretch targets the correct muscles.
Through the above techniques, the overall muscle tension of the neck and shoulder region in upper crossed syndrome can be effectively reduced and rebalanced.
Neck and Shoulder Stability Training After Muscle Release
After release work, the next step is strengthening, focusing not on raw strength but on muscle control and stability.
Neck control training progresses through three positions, mimicking early motor development:
- Supine
- Kneeling
- Standing

Supine Position
Setup
- Lie supine
- Place a resistance band in front of the body
Movement
- Gently pull the band apart, breathing normally
- With the band held open:
- Tuck the chin toward the sternum
- Return to neutral
- Perform 10 reps
Rotation
- Keep the band open
- Rotate the head left → return to neutral → rotate right → neutral
- This counts as one repetition
- Perform 10 reps
Prescription
- 1 set = full sequence
- Perform 3 sets
The resistance band activates scapular stabilisers, allowing more effective neck control training.
During rotation, always return to neutral before switching sides.
- Severe neck fatigue → start with supine
- Mild fatigue only → kneeling position is acceptable
Kneeling / Standing Position
Setup
- Half-kneeling (split stance)
- Resistance band placed in front of the body
Movement
- Pull the band apart, breathe normally
- With band held open:
- Chin tuck → return (10 reps)
- Look up → return (10 reps)
Rotation
- Left rotation → neutral → right rotation → neutral
- Perform 10 reps
Progression
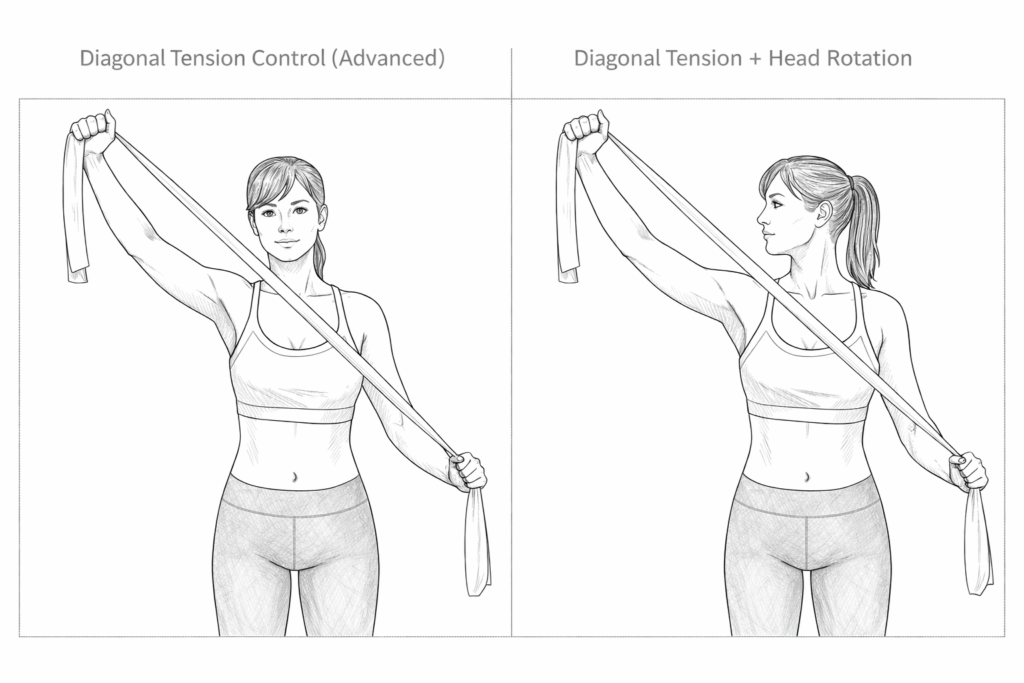
Setup
- Narrow the band to slightly wider than shoulder width
Movement
- Upper arm: external rotation
- Lower arm: internal rotation
- At the same time, rotate the head toward the elevated arm
- Return head and arms to neutral
Prescription
- Perform 3 sets
- 10 reps per side
- 1 set completed on both sides
Final Notes
This article focused on correcting neck and shoulder dysfunction in upper crossed syndrome.
In the next article, we will cover upper back and chest corrective exercises, completing the full treatment framework.
If you feel this article doesn’t fully meet your needs, feel free to check out other upper crossed syndrome stretches and exercises as well.
