
The squat is often regarded as the “king of exercises” and is almost a must-have movement in any training program. But have you ever wondered whether the squats you perform with all your effort are actually done correctly?
Poor technique not only reduces training effectiveness but may also contribute to knee pain, lower back discomfort, and potential injuries. Many people blindly imitate online tutorials while ignoring the fact that everyone has unique body structures and mobility limitations.
This article will completely change the way you understand squats. We will move beyond the outdated idea of a “one-size-fits-all” squat technique and start with an exclusive 60-second personalized assessment to identify your potential limitations in ankle mobility, hip mobility, or core stability.
Then, we will break down the five key squat checkpoints, building your ideal squat technique from head to toe. You will also learn how to find the most suitable stance width for your body, master breathing techniques to protect your spine, and develop a stronger and safer squat pattern.
Whether you are a beginner just learning how to squat or an advanced lifter looking to break through plateaus, this complete squat guide will help you build a solid foundation and train more safely, effectively, and efficiently.
Before Squatting: Perform a 60-Second Personalized Assessment to Find Your Weaknesses
Before we dive into the perfect squat technique, I want you to spend 60 seconds completing a simple personalized assessment.
To build a truly safe and effective squat pattern, the first step is not copying someone else’s technique from a video. It is understanding your own body.
This quick assessment is the starting point for developing a squat technique that fits your individual needs.
Why Self-Assessment Is the First Step Toward Proper Squat Form
Understand Your Limitations and Avoid Blind Imitation
There are countless squat tutorials online showing what appears to be the “perfect” squat form. However, directly copying these movements can sometimes create problems.
Every person’s body structure is different. Factors such as limb proportions, joint anatomy, and mobility limitations vary greatly between individuals.
For example, someone with longer femurs may naturally have a more forward torso lean during squats, while someone with different hip anatomy may require a wider stance.
Trying to force yourself into a squat style that does not match your body can limit your progress and potentially increase the risk of knee or lower back discomfort.
The purpose of self-assessment is to identify your personal limitations and help you start squatting in the safest and most effective way for your body.
Assess Mobility and Stability to Build a Strong Squat Foundation
An ideal squat requires two essential qualities:
Good joint mobility and sufficient core stability.
Mobility refers to your ability to move joints such as the ankles and hips through the required range of motion.
Stability refers to your ability to use your core muscles to maintain control and keep your spine stable throughout the movement.
If either component is lacking, your body will naturally compensate with inefficient movement patterns, affecting your squat technique and potentially increasing injury risk.
Your Personalized Squat Assessment Checklist (Complete in 60 Seconds)
Now, let’s complete this simple test.
All you need is a wall and a small amount of open space.
Test 1: Ankle Mobility (Fixing Heel Lift During Squats)
This test directly relates to whether your heels naturally lift off the ground during squats.
How to perform:
Stand facing a wall with one foot placed in front of it. Position your toes approximately one fist-width away from the wall.
Keeping your heel firmly on the ground, push your knee forward and try to touch the wall.
Results:
If your knee can reach the wall while your heel remains flat, your ankle mobility is likely sufficient.
If you cannot reach the wall, or your heel lifts off the ground, your ankle mobility may be limited. This should become one of your priorities when improving your squat.
Test 2: Hip Mobility (Influencing Squat Depth and Back Position)
Hip mobility plays an important role in determining whether you can achieve sufficient squat depth while maintaining a neutral lower back position.
How to perform:
Lie on your back with both legs straight.
Hold one knee with both hands and slowly pull it toward your chest.
Results:
Observe the opposite leg that remains extended.
If it stays completely flat on the ground without lifting, your hip mobility is likely good.
If the straight leg bends or lifts off the floor, it may indicate tight hip flexors, which can limit your squat depth.
Test 3: Core Stability (The Key to Protecting Your Spine)
Your core is the most important “armor” protecting your spine during squats.
This test evaluates your ability to control your torso.
How to perform:
Start in a quadruped position with your hands directly under your shoulders and knees under your hips.
Keep your back flat.
Slowly extend your right arm forward while extending your left leg backward until your body forms a straight line.
Results:
If you can maintain stability without significant shaking or pelvic rotation, your core has a basic level of control.
If your body shakes excessively or your pelvis rotates, you may need to improve core stability before performing heavier squats.
Using Your Assessment Results to Establish Your Personalized Squat Starting Point
After completing these three assessments, you should have a preliminary understanding of your own movement limitations.
If you discover that your ankle mobility is restricted, you can begin by placing a thin plate or wedge under your heels during squat practice. If your hip mobility is limited, you can incorporate targeted stretching and mobility exercises. If your core control is weak, adding exercises such as planks or bird dogs into your training program can be very helpful.
This is the first step in building a personalized squat standard: the goal is not to achieve perfection immediately, but to start intelligently based on your individual situation.
The Gold Standard of Squat Technique: A Complete Guide from Beginner to Advanced
To master proper squat technique, we first need to understand what an ideal squat movement should look like.
Just like learning any new skill, we should first establish the basic framework and then make adjustments based on individual differences.
Next, we will gradually build your ideal squat pattern—from the five fundamental checkpoints of body position, to finding your unique stance, and finally to a complete breakdown of the movement.
Step by step, you will learn how to develop a squat technique that fits your own body.
Universal Squat Technique: Five Key Checkpoints
During every squat repetition, you can use these five checkpoints as a mental checklist to quickly evaluate whether your technique is correct.
Once these points become a habit, they will gradually become part of your natural movement pattern.
1. Head Position and Eye Gaze: Maintain a Neutral Neck Position and Look Forward
Your gaze influences the direction of your body movement.
Throughout the entire squat, keep your eyes focused on a fixed point on the floor approximately one to two meters in front of you.
This helps your head and cervical spine remain in a natural alignment and prevents unnecessary stress on the neck caused by looking too far down or excessively lifting your head.
2. Shoulders and Chest: Retract and Depress the Shoulder Blades While Maintaining a Natural Chest Position
Before initiating the squat, gently pull your shoulder blades back and down.
This movement helps you naturally open your chest and prevents excessive rounding of your upper back during the descent.
Imagine this action as creating a stable and powerful structure for your upper body, allowing your torso to remain strong throughout the movement.
3. Back and Core: Maintain Tension and Preserve the Natural Spinal Curve
Engaging your core does not simply mean pulling your stomach inward.
Instead, imagine your abdomen as a cylinder that expands and braces evenly in all directions.
Throughout the squat, your spine should maintain its natural physiological curves. You should not force your back into an overly rigid straight position, but you should also avoid excessive rounding.
This is one of the most important steps for protecting your spine during squatting.
4. Knees and Toes: Keep Them Aligned and Prevent Knee Valgus
During both the descent and ascent, your knees should move in the same direction as your toes.
This is an important safety principle.
You should actively push your knees slightly outward and feel the muscles on the outside of your thighs engaging. This helps prevent uncontrolled inward collapse of the knees, commonly known as knee valgus.
5. Feet and Center of Gravity: Distribute Weight Across the Entire Foot
A stable foundation is the starting point of an effective squat.
Try to feel your weight evenly distributed across your entire foot, especially through three points:
- the ball of the big toe
- the ball of the little toe
- the heel
Imagine your feet acting like a tripod firmly gripping the ground.
This allows force to transfer efficiently from the floor while reducing unnecessary forward or backward movement.
Finding Your Optimal Stance Width and Toe Angle
Many people believe there is a fixed squat stance standard, such as always standing “shoulder-width apart.”
However, the reality is that everyone’s hip structure is different.
The most suitable stance width is something you need to discover based on your own body.
Use the “Standing Jump” Method to Find Your Natural Squat Stance
This is a simple yet effective method.
Stand naturally and perform two or three relaxed vertical jumps.
Then observe where your feet naturally land.
This width is often close to the stance where your body feels most comfortable and generates the most power.
Your toes may naturally point slightly outward, and this is completely normal.
Why a Personalized Stance Matters More Than a Fixed Standard
Forcing yourself into a stance that does not match your body structure can make squatting uncomfortable, limit your depth, and potentially increase injury risk.
Finding a personalized stance allows you to create a stable and efficient foundation, helping you produce more force and perform a smoother squat movement.
Bodyweight Squat Technique Breakdown (Four Steps)
Once you understand all the key principles, it is time to put everything together into a complete bodyweight squat movement.
Step 1: Setup and Initiation
Stand using the optimal stance width you discovered, with your toes slightly turned outward.
Take a deep breath, brace your core, and retract and depress your shoulder blades.
The movement should begin from the hips.
Imagine there is a chair behind you. Push your hips backward first, then allow your knees to bend naturally as you lower your body.
Step 2: Controlled Descent
Lower your body smoothly and under control.
During the descent, continuously check:
- Is your core still braced?
- Is your spine maintaining a neutral position?
- Are your knees tracking in line with your toes?
Do not simply drop into the squat.
Instead, feel the tension created by your muscles during the eccentric phase.
Step 3: Stability at the Bottom Position
Descend to the deepest position your mobility allows while maintaining proper technique.
At the bottom, your body should remain under tension rather than completely relaxed.
Your entire foot should continue to stay firmly connected with the ground.
Step 4: Drive Upward
When standing up from the bottom position, imagine pushing the floor away with your feet.
Your hips and chest should rise together at the same speed.
Avoid allowing your hips to shoot upward first, which can cause excessive forward leaning of the torso.
Once you reach the standing position, squeeze your glutes and complete the repetition.
Then you can begin your next squat repetition.
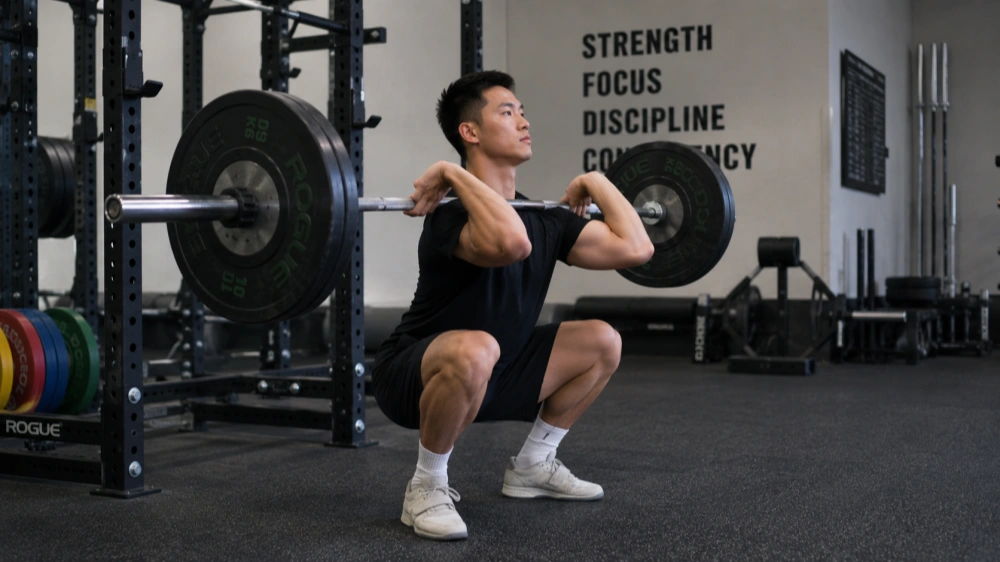
The Secret of Breathing: Learn the Valsalva Maneuver to Stabilize Your Core
When you are ready to start performing weighted squats, learning the correct breathing technique can significantly improve both your performance and safety. The Valsalva maneuver is an advanced technique that you should master.
How the Valsalva Maneuver Works: Increasing Intra-Abdominal Pressure to Protect the Spine
Simply put, the Valsalva maneuver involves temporarily holding your breath during a movement to greatly increase intra-abdominal pressure.
This pressure acts like a natural air cushion, supporting and stabilizing your spine from the inside. It helps prevent excessive spinal deformation when your body is under heavy loads, thereby protecting your lower back.
Simple Instructions and When to Use It
- Before descending, take a deep breath and expand your abdomen outward.
- Close your mouth, brace your core muscles, and hold the air inside your body.
- Maintain this breath hold and core tension while performing the squat.
- During the ascent, forcefully exhale only after passing through the most difficult point of the movement.
This technique is mainly used during heavier sets that require high levels of core stability. It is not always necessary for lighter warm-up sets.
Why This Technique Is Essential for Weighted Squats
For bodyweight squats, normal breathing patterns (inhale during the descent and exhale during the ascent) are sufficient.
However, once you begin adding external load, the Valsalva maneuver changes from an “optional technique” into a “necessary skill.”
It not only helps you lift heavier weights, but more importantly, it provides the strongest possible protection for your spine. It is an essential component of safe heavy squat training.
Where Is Your Squat Strength Level? Quantitative Standards From Beginner to Expert
When discussing squat standards, the first question many people ask is:
“How much weight should I squat to be considered good enough?”
This is a great question, but the answer is not a simple number.
A proper squat standard is highly individual. Before discussing specific weights and repetitions, it is important to understand one core concept:
The ideal squat standard is built upon perfect squat technique while allowing you to continue progressing without causing injury.
8 Personal Factors That Influence Squat Strength
Everyone’s body is unique, so personal factors must be considered when comparing strength levels.
Understanding these variables can help you evaluate your progress more objectively and set realistic goals.
Training Experience
This is the most important factor.
Someone who has trained consistently for three years will naturally have much better neuromuscular coordination, muscle mass, and technical stability than someone who has only trained for three months.
Age
Physical performance changes with age.
Generally, strength reaches its peak between the ages of 20 and 40, then gradually declines.
Sex
Due to differences in hormones and physiological structure, absolute strength standards differ between men and women.
Body Weight
People with higher body weight are generally able to lift heavier absolute loads.
Therefore, strength standards are often measured relative to body weight, which provides a fairer comparison.
Genetics
Some individuals naturally have greater muscle-building potential or strength advantages.
Technique
Your ability to perform a proper squat, including squat depth, stability, and movement efficiency, directly affects the amount of weight you can lift.
Lifestyle
Adequate sleep, proper nutrition, and effective stress management are essential foundations for strength development.
Training Equipment
Using equipment such as lifting belts, knee sleeves, or weightlifting shoes can improve performance to some degree.
Therefore, standards should also distinguish between equipped and unequipped lifting.
Squat Strength Progression: From Bodyweight to Barbell
Building strength is like constructing a building—the foundation must come first.
A clear progression pathway ensures that you improve steadily while staying within a safe training process.
We can divide squat strength development into three main levels, helping you understand where you currently are and what your next step should be.
Level 1 (Muscular Endurance): Bodyweight Squat Standards
Before considering external weight, your first priority should be mastering your own body weight.
The goal at this stage is to develop basic muscular endurance and make proper squat technique a natural movement pattern.
Beginner Level:
Complete 20 consecutive bodyweight squats with proper technique.
Good Level:
Complete 50 consecutive bodyweight squats.
Excellent Level:
Complete 100 consecutive bodyweight squats.
At this stage, quality matters far more than quantity.
Make sure every repetition follows the five key technique checkpoints discussed earlier.
Level 2 (Transition Phase): Goblet Squat Strength Standards
Once you can comfortably complete more than 50 bodyweight squats, you can enter the goblet squat transition phase.
This movement allows you to safely adapt to external load while effectively strengthening core stability.
Standards for Men:
Beginner:
Use a 16 kg kettlebell and complete 3 sets of 10 repetitions.
Intermediate:
Use a 24 kg kettlebell and complete 3 sets of 10 repetitions.
Ready for Progression:
Use a 32 kg kettlebell and complete 3 sets of 10 repetitions.
Reaching this level means you have built a strong foundation for challenging barbell squats.
Standards for Women:
Women’s standards are approximately 65–75% of men’s loading standards.
You can begin with an 8–12 kg kettlebell and aim to perform a stable squat set using a 20–24 kg kettlebell.
Level 3 (Maximum Strength): Barbell Back Squat Strength Standards (Men vs Women)
The barbell back squat is considered one of the best indicators of lower-body maximal strength.
The following standards are based on your maximum load for 1–5 repetitions (1–5RM), compared with your body weight.
Male Barbell Back Squat Standards
Beginner:
0.75 × body weight
Novice:
1 × body weight
Intermediate:
1.25–1.5 × body weight
Advanced:
1.75–2 × body weight
Elite:
More than 2 × body weight
Female Barbell Back Squat Standards
Beginner:
0.5 × body weight
Novice:
0.75 × body weight
Intermediate:
1–1.25 × body weight
Advanced:
1.5–1.75 × body weight
Elite:
More than 1.75 × body weight
Remember, these are only reference frameworks.
Your progress is defined by yourself. Continuously surpassing your previous level is the greatest achievement.
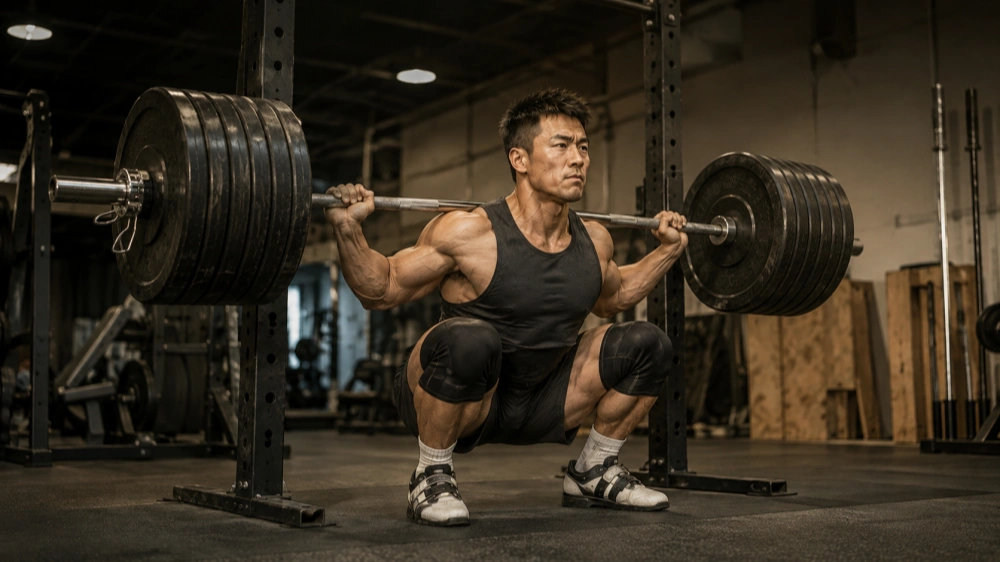
Advanced Indicator: Checking Front-to-Back Strength Balance
Once your training reaches a certain level, simply chasing heavier back squat numbers may no longer be enough.
A more comprehensive approach is to evaluate whether the muscles on the front and back sides of your body are balanced.
This not only helps you overcome plateaus but is also an important factor in injury prevention.
Ideal Strength Ratio Between Front Squat and Back Squat
The front squat (with the barbell positioned in front of the shoulders near the collarbone) places greater demands on the quadriceps and core.
The back squat, on the other hand, allows greater contribution from the glutes and hamstrings.
The strength ratio between these two movements is an excellent indicator of balanced lower-body strength.
Ideal Ratio:
Generally, your front squat 1RM should be approximately 80–85% of your back squat 1RM.
For example, if you can back squat 100 kg, your front squat should ideally be around 80–85 kg.
If your front squat strength is significantly below this ratio, it may indicate that your core stability or quadriceps strength is a relative weakness that requires targeted improvement.
Through this simple assessment, you can design your training more intelligently and build a stronger, more balanced body.
Beyond the Basics: 5 Squat Variations to Strategically Strengthen Weaknesses
Once you have mastered the basic squat technique, it is like opening a new door to the world of fitness.
The standard squat is an excellent full-body exercise, but everyone has certain weak points or specific goals they want to achieve.
This is where different squat variations become valuable.
They are like specialized tools in a toolbox, allowing you to strategically target weaknesses, make your training more complete, and add variety.
The following five squat variations can help you break through plateaus and develop greater overall physical ability.
Sumo Squat: Strengthen the Glutes and Inner Thighs
If your goal is to specifically strengthen your glutes and develop your inner thighs, the sumo squat is an excellent choice.
Compared with the traditional squat, it uses a much wider stance, with the feet positioned wider than shoulder width and toes turned outward approximately 45 degrees.
With this stance, you will feel greater involvement from the gluteus maximus and the hip adductor muscles.
How to Perform:
Start with a wide stance while keeping your upper body as upright as possible.
Lower your hips vertically toward the ground.
Your knees should track in the same direction as your toes, which is essential for protecting your knee joints.
Descend to a comfortable depth, then drive through your hips to return to the starting position.
After completing a set, you will notice that this variation also provides an excellent challenge for hip mobility.
Bulgarian Split Squat: Improve Left-to-Right Strength Imbalances
Many people do not have completely symmetrical strength between their left and right legs.
This imbalance may affect athletic performance and even increase injury risk.
The Bulgarian split squat is an excellent unilateral exercise that can effectively address this issue.
Because most of your body weight is placed on one leg, it immediately reveals which side is weaker.
How to Perform:
Place the top of one foot on a stable bench or box, with your front foot positioned forward.
Lower your body vertically until the thigh of your front leg reaches approximately parallel with the ground.
Maintain core tension and body stability throughout the movement.
This exercise requires significant balance and control while also stretching the hip flexors of the rear leg.
Box Squat: Build Proper Squatting Pattern and Depth Control
Many beginners struggle with how deep they should squat or have difficulty learning the feeling of “sitting back” with the hips.
The box squat was designed to solve these problems.
By using a box or bench as a target, you can consistently reach the same depth while encouraging a hip-dominant movement pattern.
How to Perform:
Place a box at an appropriate height behind you.
Your stance can be slightly wider than your normal squat stance.
Push your hips backward as if you are sitting down until you lightly touch the box.
The key is to maintain muscular tension—not completely relax and sit on the box.
Then drive through your hips and legs to stand up explosively.
This exercise helps establish a proper squat movement pattern and is particularly effective for developing posterior-chain strength.
Squat Jump: Develop Lower-Body Explosive Power
If your goal is improving athletic performance, such as jumping higher or running faster, developing lower-body explosiveness is essential.
The squat jump is a basic plyometric exercise that effectively trains your ability to produce force quickly.
How to Perform:
Start from a standard bodyweight squat position.
Lower yourself to approximately half or three-quarter squat depth.
Then jump upward with maximum effort, fully extending your body in the air.
The most important part is the landing.
Keep your knees slightly bent to absorb impact through your muscles, then smoothly return to the squat position and prepare for the next repetition.
After completing a set, you will notice a significant increase in your heart rate.
Overhead Squat: The Ultimate Mobility and Stability Challenge
The overhead squat can be considered a full-body assessment.
It requires extremely high levels of mobility, stability, and coordination.
This movement can immediately reveal limitations in your shoulders, thoracic spine, core, hips, and ankles.
How to Perform:
Hold a stick or lightweight barbell overhead with a wide grip.
While keeping your arms fully extended and the bar stable directly above your head, perform a complete squat.
Throughout the movement, your torso must remain upright and your core must stay highly engaged.
The focus of this exercise is movement quality, not load.
Even if you can perfectly perform an overhead squat using only a stick, it demonstrates a very high level of body control and squat proficiency.
Common Squat Questions (FAQ): Expert Answers to 5 Common Problems
On the journey toward mastering the perfect squat, you will inevitably encounter confusing “myths” and technical challenges.
These issues are not limited to beginners. Even experienced lifters may need to revisit and reassess their technique from time to time.
Here, we have compiled five of the most common squat-related questions and provided clear, professional answers to help you build a safer and more effective squat technique.
Question 1: Can Your Knees Go Past Your Toes During a Squat?
This is probably one of the most frequently asked questions among squatters.
The answer is: Yes, they can—and in most cases, this is completely natural.
Treating “your knees should never pass your toes” as an absolute rule can actually distort your squat technique.
Think about climbing stairs. Your knees naturally move forward past your toes. If you artificially restrict your knees from moving forward, your body must compensate by pushing your hips excessively backward to maintain balance.
This can increase unnecessary stress on the lower back and limit effective quadriceps training.
The real focus should not be the position of your knees relative to your toes, but rather:
- Whether your weight remains stable across your entire foot
- Whether your spine maintains a neutral position
Everyone has different body proportions, such as the ratio between femur length and torso length. These differences directly influence your torso angle and how far your knees naturally travel forward during a squat.
Therefore, instead of rigidly following a rule that does not apply to everyone, focus on moving smoothly, allowing your hips and knees to work together naturally.
Question 2: How Can You Fix Knee Valgus During Squats?
When your knees collapse inward during a squat, commonly known as knee valgus, it is a technical error that should be addressed.
Not only does it reduce your ability to produce force, but it may also place excessive stress on the knee joint structures and increase injury risk.
Knee valgus is often caused by insufficient strength or activation of the lateral hip muscles, especially the gluteus medius.
You can try the following methods to improve your squat technique:
Build Movement Awareness
During your squat, constantly remind yourself:
- “Keep your knees tracking toward your toes.”
- “Push the floor apart with your feet.”
Imagine your feet rotating outward into the ground like screws being tightened.
This mental cue can help activate the lateral glute muscles and improve knee stability.
Use Resistance Bands for Assistance
Place a mini resistance band slightly above your knees during bodyweight squats.
The band will pull your knees inward, forcing you to actively push your knees outward against the resistance.
This is an effective tool for improving neuromuscular control.
Perform Activation Exercises Before Squatting
Before your squat workout, include glute activation exercises such as:
- Clamshells
- Lateral band walks
These movements help “wake up” your glute muscles so they can better stabilize your knees during squats.
Question 3: How Can You Prevent Lower Back Rounding at the Bottom of a Squat (Butt Wink)?
When you reach the bottom position of a squat, you may notice your lower back losing its natural curve and your pelvis rotating backward.
This is known as butt wink.
A small amount of pelvic movement at the very end range may be acceptable, but excessive or early pelvic rotation can increase stress on the lumbar spine.
The causes are complex and usually involve mobility limitations.
Limited Ankle Mobility
This is one of the most common causes.
If your ankle dorsiflexion is insufficient, your body may compensate by rotating the pelvis backward in order to achieve greater squat depth.
Possible solutions include:
- Placing a small weight plate under your heels
- Wearing weightlifting shoes
These adjustments can help improve your squat position.
Hip Mobility or Structural Limitations
Everyone has different hip joint structures.
Factors such as acetabulum depth and hip anatomy naturally influence your available range of motion.
Tight hip adductors may also restrict squat depth.
Insufficient Core Control
If you cannot maintain core tension throughout the movement, your pelvis may lose stability at the bottom position.
Solution:
Only squat to the depth where you can maintain a neutral spine.
Do not force yourself to “squat as deep as possible” at the expense of technique.
Instead:
- Use box squats to develop depth control
- Improve ankle and hip mobility through targeted training
- Gradually increase your available range of motion
Question 4: What Shoes Should You Wear for Squats? Flat Shoes or Weightlifting Shoes?
Your footwear choice can significantly affect squat stability and force transfer.
Avoid Soft Running Shoes
You should avoid performing heavy squats in running shoes with thick, soft cushioning.
A soft shoe is similar to lifting weights while standing on sand.
It absorbs force generated against the ground and creates instability, reducing your ability to transfer power effectively.
Two Ideal Options:
Flat Hard-Soled Shoes
Examples include:
- Canvas shoes
- Dedicated flat lifting shoes
They provide a stable platform and allow your feet to connect firmly with the ground.
For people with good ankle mobility, this is an affordable and effective choice.
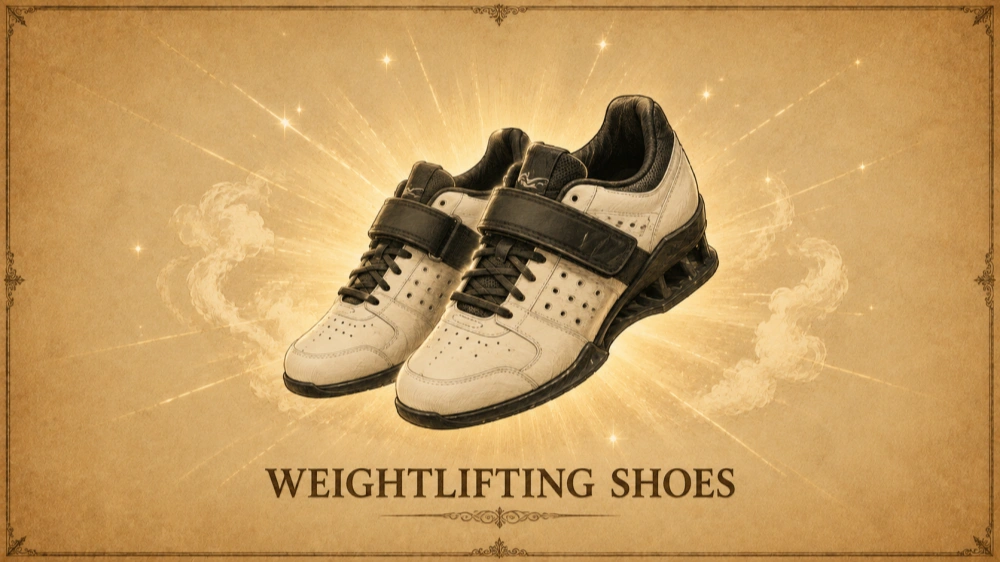
Weightlifting Shoes
Weightlifting shoes feature:
- A rigid sole
- An elevated heel
The raised heel helps compensate for limited ankle dorsiflexion and allows you to maintain a more upright torso position during squats.
If ankle mobility prevents you from reaching proper squat depth, investing in weightlifting shoes can be highly beneficial.
Question 5: What Training Frequency and Sets Are Recommended for Beginners?
For beginners, learning proper movement patterns is far more important than chasing heavier weights or higher repetitions.
A reasonable starting point is to focus on bodyweight squats and build a strong foundation.
Training Frequency
Perform squat training:
2–3 times per week
Allow at least one day between sessions so your muscles and nervous system have enough time to recover and adapt.
Sets and Repetitions
A good starting point:
- 3–4 sets per workout
- 10–15 repetitions per set
During every set, focus entirely on movement quality.
Do not rush through repetitions just to complete more numbers.
Once you can comfortably complete these sets and repetitions with perfect technique, you can gradually increase difficulty by:
- Adding more sets
- Trying different squat variations
- Introducing light resistance through movements such as the goblet squat
Remember:
Consistent practice, patience, and commitment to proper technique are the only reliable paths toward building a stronger squat.